In 2026, industrial lining selection is no longer based only on chemical resistance or purchase price. Plant engineers also measure installation time, surface preparation, curing requirements, and future maintenance access. A lining that performs well in a laboratory may still delay production on a crowded site. This guide examines the best industrial lining types for practical installation conditions.
Rubber linings remain useful for abrasion and chemical exposure, especially inside tanks, pipes, and slurry equipment. Polyurethane systems can offer fast application and strong wear resistance. HDPE and other thermoplastic liners provide consistent thickness and clean installation when fabrication is controlled. Ceramic linings suit severe abrasion zones, but their weight and fitting demands require careful planning. FRP systems can cover complex shapes, although humidity and resin curing cannot be ignored.
The goal is to Improve installation efficiency of industrial lining solutions without weakening long-term protection. Experienced contractors usually begin with inspection, moisture testing, and substrate repair. Small surface defects matter. They can create early blistering or poor adhesion. In the field, access, ventilation, temperature, and crew skill often decide the result. Product data sheets remain essential, yet site conditions may expose limitations that specifications do not show. No lining is perfect. A rushed installation can undermine an excellent material. This article compares lining types through application speed, durability, safety, repairability, and lifecycle value. It also highlights practical trade-offs, because the cheapest option is not always the most efficient one. Good decisions come from evidence, qualified advice, and honest review of previous projects.
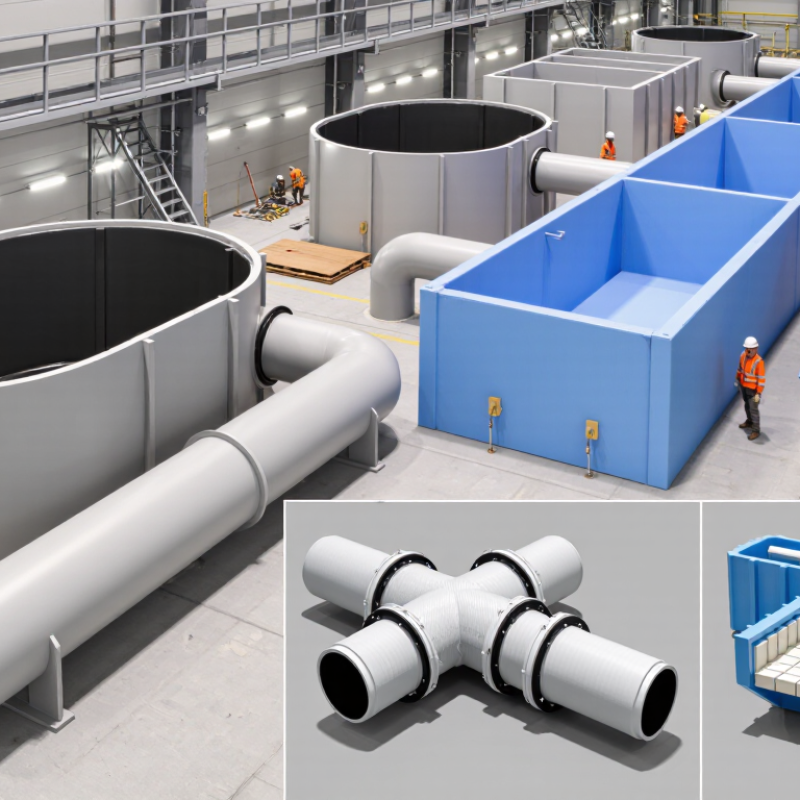
Industrial linings protect tanks, pipes, floors, and process equipment from corrosion, abrasion, heat, and chemical attack. Their purpose is practical: extend service life while reducing leaks, repairs, and production interruptions. During site inspections, I have seen a sound lining fail because the steel surface was damp or poorly prepared.
Material selection depends on the operating environment. Epoxy linings provide strong adhesion and chemical resistance in many moderate-temperature applications. Rubber linings absorb impact and resist aggressive chemicals, but installation requires careful joint treatment.
Polyurethane systems suit areas exposed to abrasion and movement. Ceramic-filled linings can protect high-wear zones, although surface preparation and curing control become more demanding.
Performance depends on more than material charts. Temperature, immersion time, chemical concentration, substrate condition, and cleaning methods all matter. A lining may tolerate a chemical briefly but fail under continuous exposure. Thickness must be checked with suitable gauges, while holiday testing can reveal pinholes before service begins. Ventilation and curing time also influence the final result.
Small details matter. Clean edges. Dry surfaces. Correct mixing ratios. I once underestimated humidity during a repair, and the coating appeared cured but later blistered. That mistake changed my inspection routine. Installation speed should never replace verification, yet excessive checking can delay work unnecessarily. A practical plan balances both, using documented readings, trained applicators, and realistic curing windows.
Selecting an industrial lining begins with the operating environment, not installation speed. Record the fluid, temperature, pressure, abrasion level, and cleaning method. A chemical-resistant lining may fail quickly under sharp solids or repeated thermal cycling. Rubber linings can absorb impact, while ceramic systems suit severe abrasion but require careful surface preparation. For hot, aggressive service, engineered resin linings may offer practical protection when applied within their temperature limits.
Inspect the substrate before choosing a system. Rust, moisture, weld defects, and surface contamination can reduce adhesion. In real projects, installation delays often come from incomplete preparation rather than the lining itself. Confirm curing time, ventilation needs, repair procedures, and applicator experience. Verify technical data against recognized testing methods and the equipment manufacturer’s operating records. Do not rely on one laboratory result. Conditions in the field are less tidy.
Tips: Build a simple duty profile for each vessel or pipe section. Include peak temperature, chemical concentration, particle size, and cleaning frequency. Ask for documented compatibility evidence. Leave realistic time for inspection and curing. A rushed lining can become an expensive repair. Choose efficiency carefully; the fastest application is not always the most reliable choice.
Industrial lining selection directly affects installation speed, service life, and shutdown planning. The NACE IMPACT Study estimated global corrosion costs at about US$2.5 trillion annually, equal to nearly 3.4% of global GDP. That figure makes surface preparation more than a technical detail.
Epoxy linings suit dry tanks, steel structures, and moderate chemical exposure. They require abrasive blasting, controlled humidity, and a clean, dust-free surface.
Vinyl ester systems tolerate stronger acids and solvents, but installers must control resin mixing, ventilation, and curing temperature.
Rubber linings need careful adhesive application and seam inspection.
Polyurethane linings can shorten downtime, although moisture may cause bubbling or poor adhesion. Moisture is unforgiving.
ISO 12944-5:2018 emphasizes coating-system selection according to corrosivity, substrate preparation, and expected durability. AMPP/NACE SP0188 also supports high-voltage holiday testing after curing, especially for continuous immersion service.
In the field, dry-film thickness should be checked at multiple points, not only near access doors. In practice, this is where plans become less tidy. Cold steel, uneven welds, and limited ventilation often extend installation time.
A better specification should state surface cleanliness, profile depth, recoat windows, curing conditions, inspection points, and repair methods before work begins. Even then, one assumption may fail. Field verification remains necessary.
Industrial lining installation becomes faster when the crew follows a measured sequence, not a rushed schedule. In field work, I start by isolating the vessel, confirming permits, and checking ventilation. The surface is inspected for oil, moisture, rust, and loose concrete. A simple moisture reading can prevent hours of rework. Edges and welds receive extra attention because thin spots often begin there. Do not guess.
The lining type should match the service conditions. Epoxy systems suit many chemical tanks, while rubber linings handle repeated impact and flexible movement. Ceramic-filled materials can protect areas exposed to abrasion. These choices require confirmation from chemical compatibility data, operating temperature, and flow speed. After preparation, workers mask flanges, anchor points, and drains. They mix only the quantity usable within the working time. A calibrated mixer and clean containers reduce uneven curing. Record batch numbers, temperature, humidity, and film thickness.
Apply the first coat in controlled passes, keeping a wet edge and avoiding heavy buildup at corners. Allow the specified cure interval before applying another coat. Check the surface with a thickness gauge and inspect for pinholes using an approved holiday detector. Repairs should be marked, cleaned, and retested. Keep walkways dry and route hoses away from access paths. Respiratory protection and fall controls are not optional. I have learned that rushing the final inspection creates hidden defects. A second inspection often catches missed holidays near nozzles and weld seams.
| Lining Type | Typical Industrial Service | Common Application Method | Recommended Installation Steps | Typical Thickness | Typical Cure or Cool-Down Time | Efficiency Advantage | Primary Safety Controls | Quality Verification |
|---|---|---|---|---|---|---|---|---|
| High-Solid Epoxy | Concrete floors, steel tanks, secondary containment, wastewater structures, and chemical-resistant surfaces. | Airless spray, roller, brush, or squeegee-applied multi-coat system. |
1. Remove oil, laitance, rust, and loose material. 2. Abrasive blast or mechanically profile the substrate. 3. Repair cracks and voids. 4. Apply primer and body coats within the specified recoat window. 5. Inspect dry film thickness and holiday-free coverage. |
Approximately 0.5–3.0 mm for coating systems; thicker systems may require filled epoxy layers. | Approximately 24–72 hours before light service at about 20–25°C, depending on formulation, thickness, humidity, and ventilation. | Widely available application equipment, strong adhesion, and no hot-work requirement during normal application. | Ventilation, respirator selection based on the safety data sheet, chemical-resistant gloves, eye protection, and ignition control where flammable vapors may be present. | Surface profile, ambient conditions, wet or dry film thickness, adhesion, visual defects, and holiday testing where applicable. |
| Polyurethane | Abrasion-resistant floors, loading areas, process rooms, wastewater zones, and surfaces exposed to thermal or mechanical movement. | Roller, squeegee, broadcast aggregate, or spray application. |
1. Prepare and dry the substrate. 2. Apply compatible primer. 3. Install the body coat and broadcast aggregate if required. 4. Remove excess aggregate after cure. 5. Apply the seal coat and verify uniform coverage. |
Approximately 1.5–6.0 mm for common industrial floor systems; thinner protective coatings are also available. | Approximately 12–48 hours for light service at about 20–25°C; full chemical and mechanical resistance may require longer. | Fast return-to-service options, good abrasion resistance, and improved flexibility compared with many rigid coatings. | Moisture control, ventilation, skin and eye protection, slip-resistant footwear, and strict control of mixing ratios. | Substrate moisture, thickness, bond strength, surface texture, slip resistance, and visual continuity. |
| Vinyl Ester Resin | Acid tanks, chemical sumps, scrubber components, ducts, process vessels, and highly corrosive environments. | Hand lay-up, roller consolidation, spray-up, or resin-rich laminate construction with glass reinforcement. |
1. Abrasive-blast or mechanically prepare the substrate. 2. Apply resin-compatible primer. 3. Wet out and place reinforcement layers. 4. Consolidate each layer to remove trapped air. 5. Apply the corrosion barrier and post-cure when specified. |
Approximately 2–6 mm for common reinforced corrosion barriers; design thickness depends on chemical and structural conditions. | Approximately 8–24 hours for initial cure at controlled temperature; post-curing may be required for demanding chemical service. | Excellent chemical resistance and the ability to build thickness in fewer reinforced layers than thin-film coatings. | Organic-vapor protection, ventilation, control of peroxide catalysts, fire prevention, chemical-resistant clothing, and confined-space procedures. | Resin-to-fiber wet-out, laminate thickness, hardness, bond quality, voids, cure condition, and spark testing where appropriate. |
| Rubber Sheet Lining | Acid tanks, chemical vessels, flue-gas equipment, slurry pipelines, and surfaces requiring resilient corrosion protection. | Preformed rubber sheets bonded to prepared steel or concrete and vulcanized or chemically cured at joints. |
1. Abrasive-blast the substrate to the specified cleanliness and profile. 2. Apply primer and bonding adhesive. 3. Position sheets and roll out trapped air. 4. Stitch or seal seams according to the lining design. 5. Allow adhesive and seams to cure before testing. |
Approximately 2–6 mm for many industrial sheet-lining systems; thicker grades are used for severe abrasion or impact. | Approximately 24–72 hours for adhesive cure at controlled conditions; seam cure and service temperature can extend the schedule. | Consistent factory-produced sheet thickness, excellent flexibility, and strong resistance to many acids and abrasive slurries. | Ventilation, solvent-exposure controls, flame and spark prevention, correct adhesive handling, and safe access inside vessels. | Visual seam inspection, spark testing, adhesion checks, thickness confirmation, and leak testing where required. |
| HDPE or PP Sheet Lining | Secondary containment, wastewater basins, chemical pits, landfill drainage systems, and low-temperature chemical storage areas. | Thermoplastic sheets joined by hot-air, extrusion, or wedge welding. |
1. Survey and repair the supporting substrate. 2. Cut and position sheets with planned overlaps. 3. Tack sheets to maintain alignment. 4. Weld seams using qualified procedures. 5. Perform non-destructive seam testing and repair defects. |
Approximately 2–5 mm for many containment applications; engineering requirements may specify greater thickness. | No chemical curing period; welded seams normally require cooling before testing, often within minutes to a few hours depending on weld size and layout. | Very fast return-to-service after seam inspection, excellent chemical resistance, and no solvent-based coating cure. | Hot-surface and burn protection, welding-fume ventilation, fire prevention, fall protection, and confined-space controls. | Trial welds, weld-temperature records, peel tests, vacuum-box testing, air-channel testing, and visual inspection. |
| Ceramic-Filled Epoxy | Pumps, elbows, chutes, impellers, pipe sections, and other components exposed to severe abrasion and erosion. | Trowel, hand-pack, or specialized spray application over a mechanically prepared surface. |
1. Remove corrosion products and contaminants. 2. Create a sharp mechanical profile by abrasive blasting or grinding. 3. Apply the material at the specified thickness. 4. Compact and finish the surface without trapping air. 5. Cure and inspect high-wear zones before assembly. |
Approximately 3–10 mm in localized wear areas; exact thickness depends on particle size, velocity, and impact conditions. | Approximately 24–72 hours before normal service at about 20–25°C; elevated-temperature curing may shorten the schedule when permitted. | Allows localized repairs without replacing complete components and provides high-build protection in one or two applications. | Dust extraction, respiratory protection during surface preparation, chemical-resistant gloves, eye protection, and safe handling of heavy repair compounds. | Thickness measurement, surface profile, bond inspection, hardness or cure verification, and visual checks for pinholes or voids. |
| Cementitious Protective Lining | Concrete tanks, potable or process-water structures, wastewater channels, manholes, and damp mineral substrates. | Hand trowel, spray, or wet-spray application over dampened concrete or masonry. |
1. Remove unsound concrete and contaminants. 2. Repair cracks, honeycombs, and damaged edges. 3. Pre-wet the substrate to a saturated-surface-dry condition. 4. Apply the lining in controlled layers. 5. Moist-cure or protect the lining as specified. |
Approximately 3–12 mm for protective repairs; thicker sections may be installed in multiple lifts. | Typically 24–72 hours before light exposure; continued moist curing is commonly required for several days to achieve design performance. | Tolerates damp mineral substrates better than many resin systems and can be applied with relatively simple equipment. | Silica-dust control, respiratory protection, eye protection, safe mixing, wet-floor precautions, and controlled access during curing. | Substrate condition, layer thickness, curing conditions, bond strength, cracking, and visual uniformity. |
| Planning note: The values shown are typical industry planning ranges rather than guaranteed product specifications. Actual installation speed, cure time, thickness, and return-to-service conditions depend on substrate condition, temperature, humidity, ventilation, chemical exposure, lining design, crew qualification, and the applicable project specification. Confirm final requirements using the selected system’s technical data sheet, safety data sheet, and relevant engineering standards. | ||||||||
Industrial lining service life depends less on the initial material choice than on disciplined maintenance. The NACE IMPACT study estimated global corrosion costs at 2.5 trillion dollars annually, equal to about 3.4% of global GDP. Small lining defects can create large operating losses.
Inspect linings during planned shutdowns. Look for blistering, cracking, pinholes, edge lifting, and unusual discoloration. Check high-risk areas first, including joints, drains, agitator zones, and liquid lines. A dry, clean surface reveals problems earlier. Record photographs, temperatures, chemicals, and defect locations. These details improve repair decisions.
Use adhesion testing and holiday detection when the lining system permits. Follow the coating supplier’s stated test limits and applicable standards. The U.S. Department of Energy reports that preventive maintenance can reduce costs by 12–18% compared with reactive maintenance. This figure is not lining-specific, but the principle remains useful. Remove deposits before they harden. Control moisture before repairs. Keep spare repair materials properly sealed.
A perfect schedule is unrealistic. Production pressure will interrupt inspections. That weakness needs planning. Set short visual checks between major shutdowns, even if they last only ten minutes. Review failed areas after every repair. Repeated damage may indicate excessive temperature, poor drainage, chemical concentration, or incorrect application. NACE IMPACT Study, 2016; U.S. Department of Energy, Operations and Maintenance Best Practices Guide.
Typical service-life planning ranges for industrial lining systems under controlled installation and suitable operating conditions.
It protects tanks, pipes, floors, and equipment from corrosion, abrasion, heat, and chemical attack. A lining can reduce leaks, repairs, and production interruptions. Protection has limits.
Start with the operating environment, not installation speed. Record the fluid, temperature, pressure, abrasion level, and cleaning method. Consider immersion time and chemical concentration. A material chart alone is insufficient.
Epoxy linings provide strong adhesion and chemical resistance in many moderate-temperature applications. They require clean, dry surfaces and accurate mixing. Continuous exposure may exceed their limits.
Rubber linings absorb impact and resist aggressive chemicals. They suit areas with repeated impact or flexible movement. Joint treatment must be careful. Small gaps can become failure points.
Ceramic-filled linings suit zones exposed to severe abrasion. They can protect surfaces exposed to sharp particles and fast material flow. Surface preparation and curing control are demanding. Do not rush them.
Rust, moisture, oil, loose concrete, weld defects, and contamination can reduce adhesion. Edges and weld seams need extra attention. I once underestimated humidity during a repair. The coating looked cured, then blistered.
Measure moisture, temperature, humidity, and film thickness during installation. Use suitable gauges to confirm thickness. Holiday testing can reveal pinholes before service begins. Mark, repair, clean, and retest defects.
Follow a measured sequence instead of rushing the schedule. Isolate the vessel, confirm permits, and check ventilation before work begins. Mix only usable quantities within the working time. Efficiency needs judgment.
Industrial linings protect tanks, pipelines, reactors, chutes, and other equipment from corrosion, abrasion, chemical attack, heat, and mechanical stress. Selecting the right lining begins with evaluating operating temperature, chemical exposure, material flow, pressure, substrate condition, and expected service life. Common 2026 lining options include polymer linings, rubber linings, ceramic systems, protective coatings, and composite solutions, each with different requirements for surface preparation, bonding, curing, thickness control, and environmental conditions.
To Improve installation efficiency of industrial lining solutions, project teams should use clear inspection standards, accurate measurements, suitable preparation tools, and a well-organized installation sequence. Step-by-step procedures should include substrate inspection, cleaning, repair, application, joint treatment, curing, and final quality checks. Safety controls, trained personnel, and proper ventilation also help reduce delays and installation risks. After completion, scheduled inspections, prompt repairs, controlled operating conditions, and accurate maintenance records can extend lining service life, reduce unexpected downtime, and support stable industrial performance.

Xingli Industrial Ceramics